Adding data source to a case
Once you have created a case, you may start adding data sources to it. There are a few ways to add a data source:
- Using the button on the second page of a new case creation.
- Using the Add data source menu from the Actions menu of the Dashboard window.
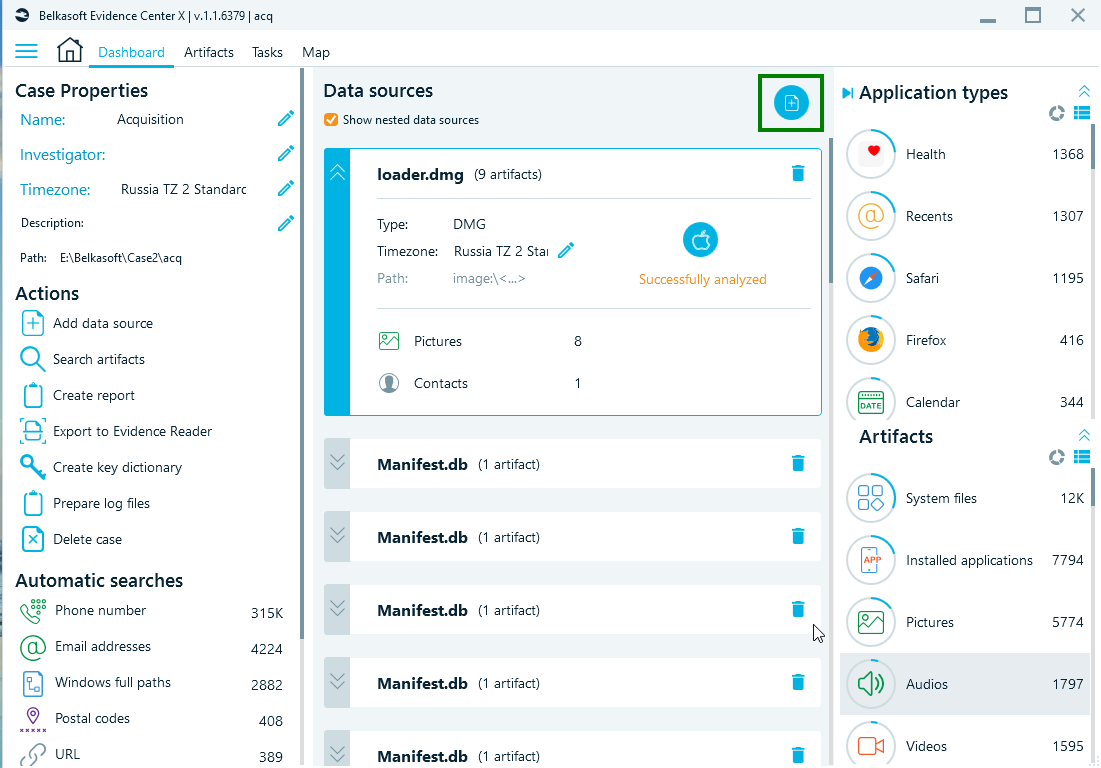
- Using the round + button at the right top corner of the middle part of the Dashboard window.
Whichever way you use, the following screen will be shown:
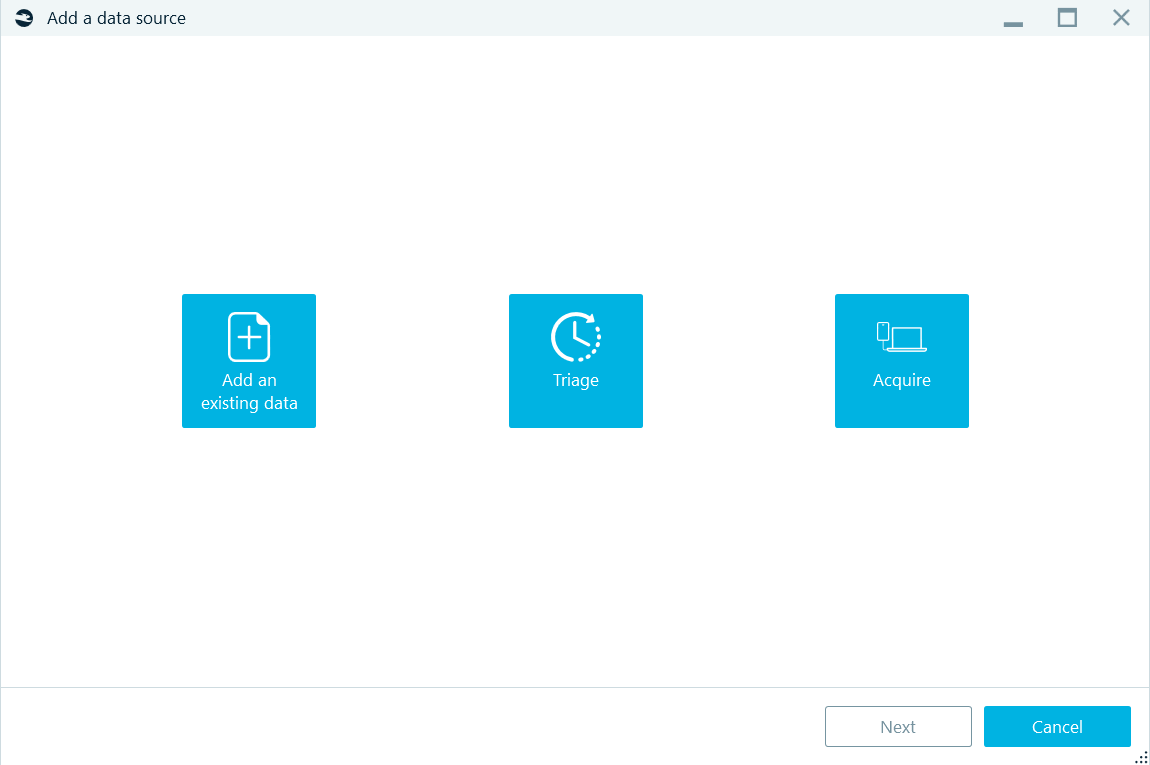
To add an existing data source, select the corresponding button at the left. Triage and device acquisition are described in other chapters of this document.
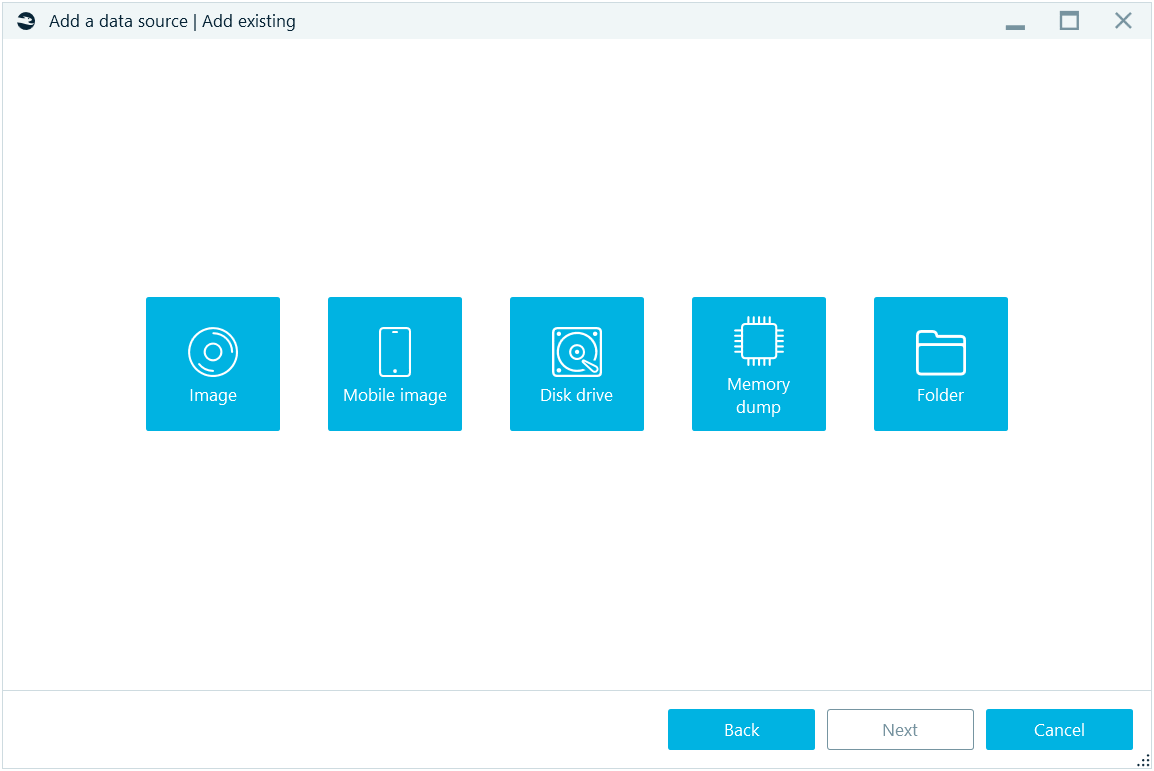
There are various types of data sources the product supports, including:
- Images of a computer or a mobile device, created by various third-party tools as well as by Belkasoft X.
- Disk and removable drives, including ones inside a hardware write blocker device.
- Memory dumps for various operating systems.
- Folders.
Select any of them on the Add existing window of Add data source sequence:
You will be prompted to browse for the image (for options Image, Mobile image and Memory dump), a folder (for Folder option), and, for Disk drive, you will be presented with the list of all physical and logical drives existing in your system:
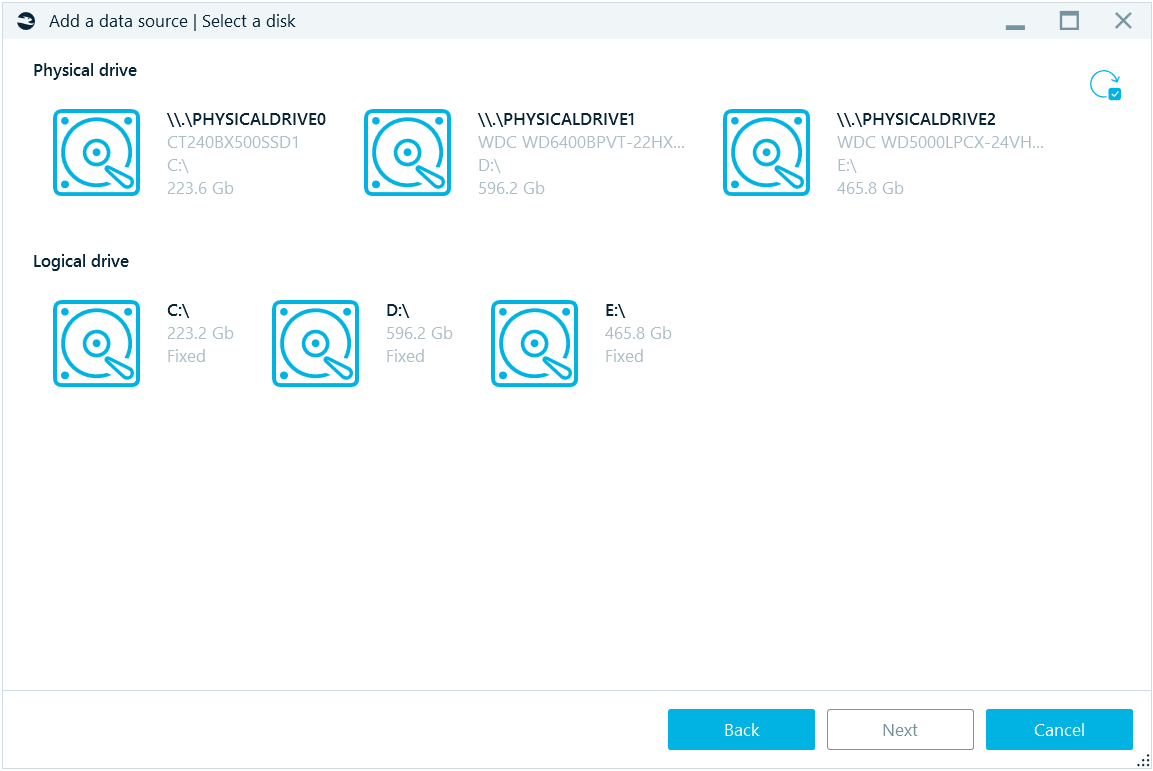
Select any physical or logical drive. If you just connected a device (for example, a removable logical drive), and do not see it in this list, click on the Refresh button at the top right corner.
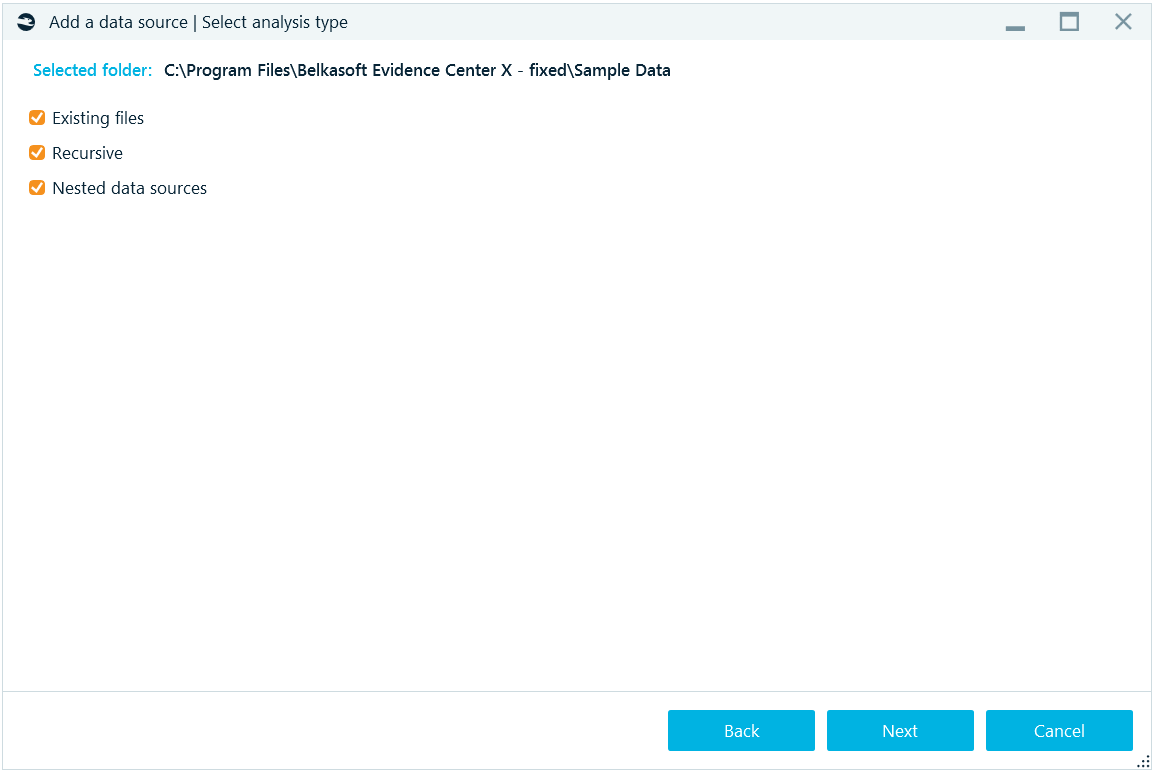
Once you have selected a data source, you will be asked further questions, depending on the type of the data source. For example, for a folder there are the following options:
- Existing files option: analyze existing files found inside the folder.
- Recursive option: whether to analyze the selected folder along with subfolders, or analyze the selected folder only.
- Nested data sources option: whether to add a ‘nested’ (or ‘internal’) data source, such as a virtual machine file, page file, hibernation file, smartphone backup, DMG file, etc., found inside the folder, to the case.
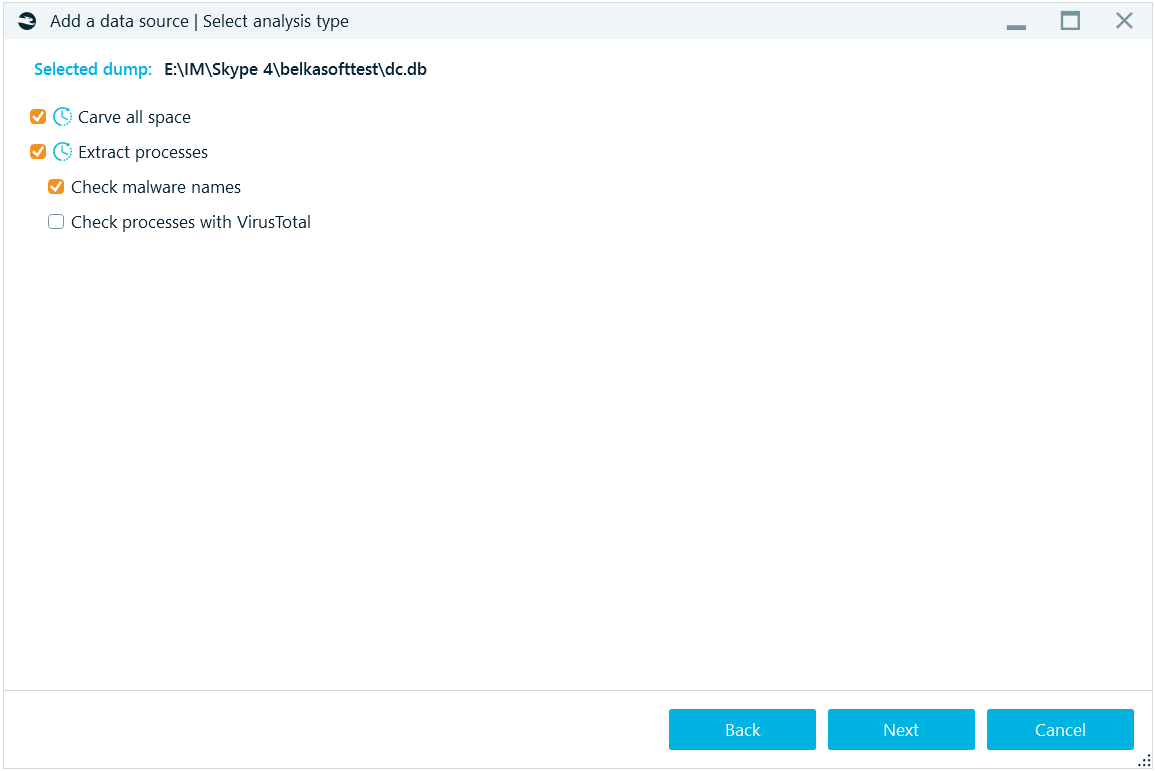
For a memory dump, the set of options differs:
- Carve all space: whether to carve the dump for artifacts, basing on signatures for different supported artifacts.
- Extract processes: whether to extract a list of processes which were running at the moment of the dump creation.
- Check malware names: this option is only available if you have opted to extract processes. For extracted processes, this will check if their names are suspicious (that is, mimicing a known system process name by slightly changing the name, say, scvhost.exe instead of svchost.exe).
- Check processes with VirusTotal: the option is only available if you have opted to extract processes. For extracted processes, this will upload the entire process memory to VirusTotal and get the result of whether the process is classified as a malware or a virus. You will need an Internet connection for this analysis to work properly. Also note, that the entire process memory is uploaded (not a hash value, as for files) because the process is different every time it is run and uploading its hash value will give you no meaningful results.
Note: the clock icon  , which designates a ‘long operation’. It is shown for every option, which will presumably take a lot of time. Consider unchecking such options if you do not really need to view them.
Options Check Malware name and Check proceeded with VirusTotal can also be run in the File system tab.
For a physical image of a disk, such as a computer or a mobile physical image and real hard or removable drive, the Select disk partitions window will be shown:
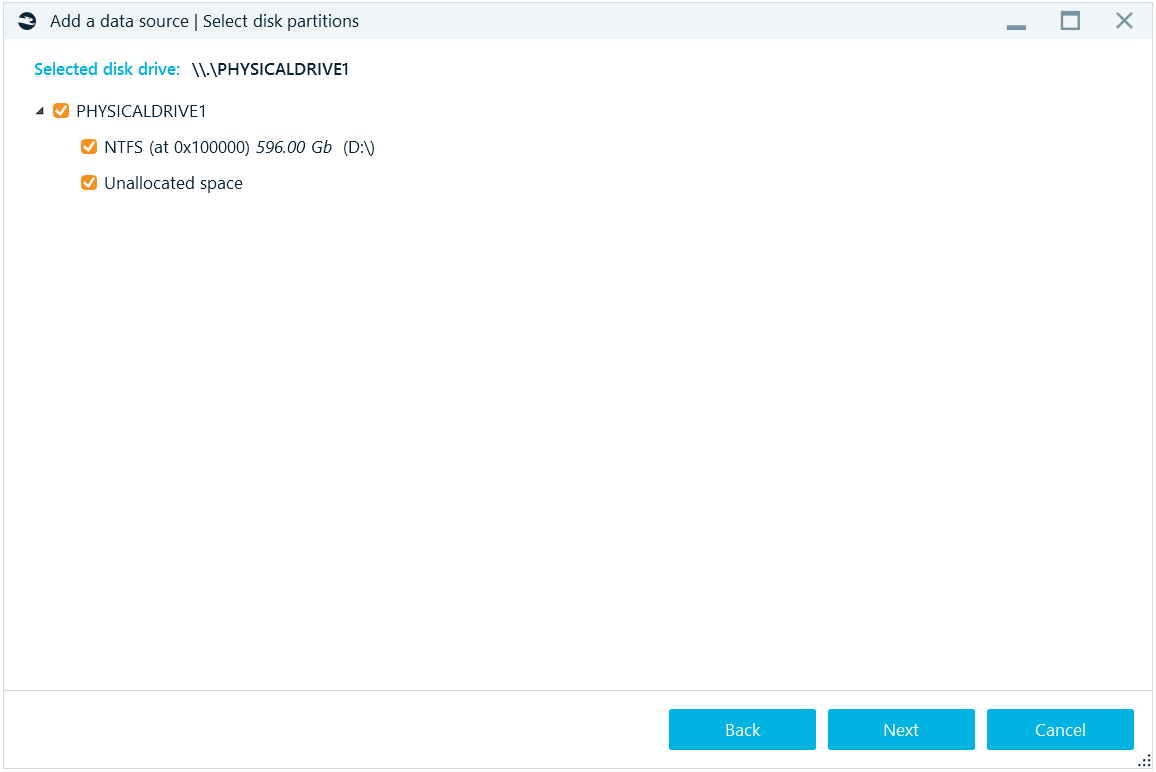
On this window you can select, which parts of an image to add to your case. This way, you can exclude parts of the data source, you do not need (for example, system or reserved areas).
If any of partitions are encrypted, the product will show you the Enter password box next to the partition name and the lock icon at the left of it:
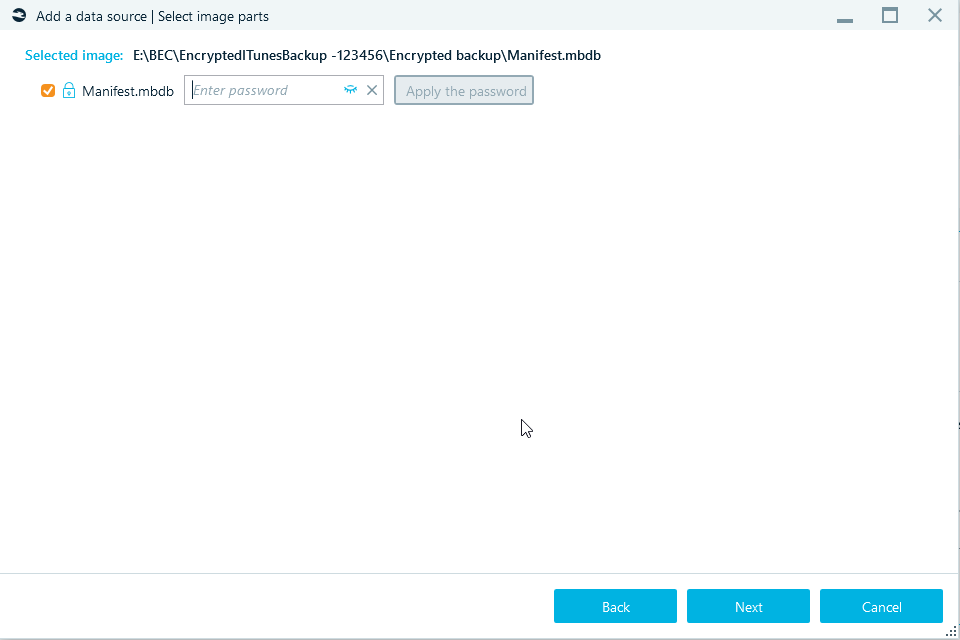
Once you have specified a password, click on the Apply the password button. If the password is correct, the product will show you decrypted volume structure. The lock icon will turn green and the corresponding label will be shown for the partition (or, as on the screenshot, for an iTunes backup):
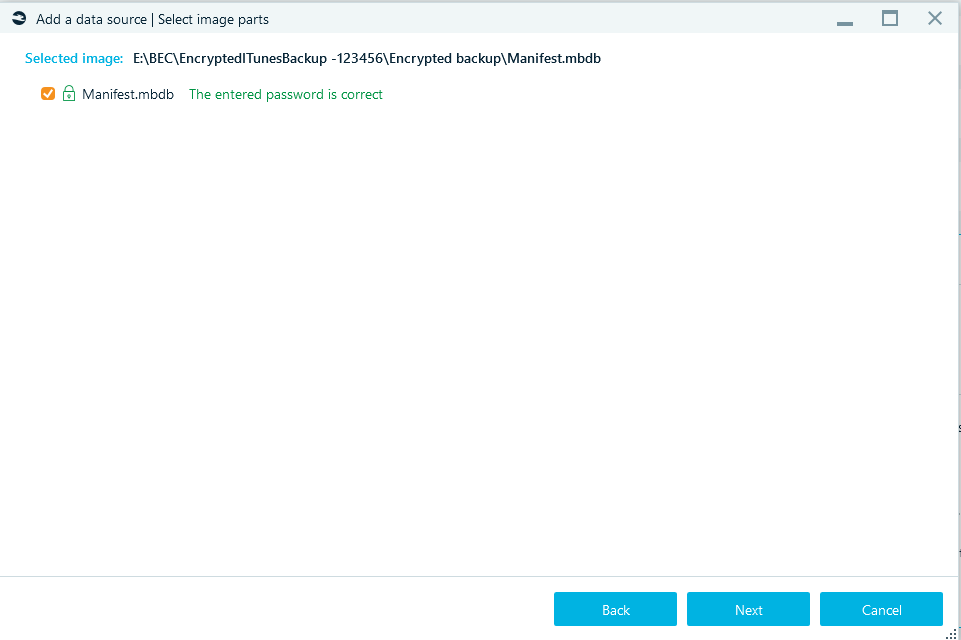
Otherwise, the product reports that the password is not correct, and you will get another chance to try another password.
By default, your input is hidden inside the Enter password box, however, you can unhide it by using the eye icon.
On the next window, select analysis type, you can fine tune what kinds of analysis to perform on each partition.
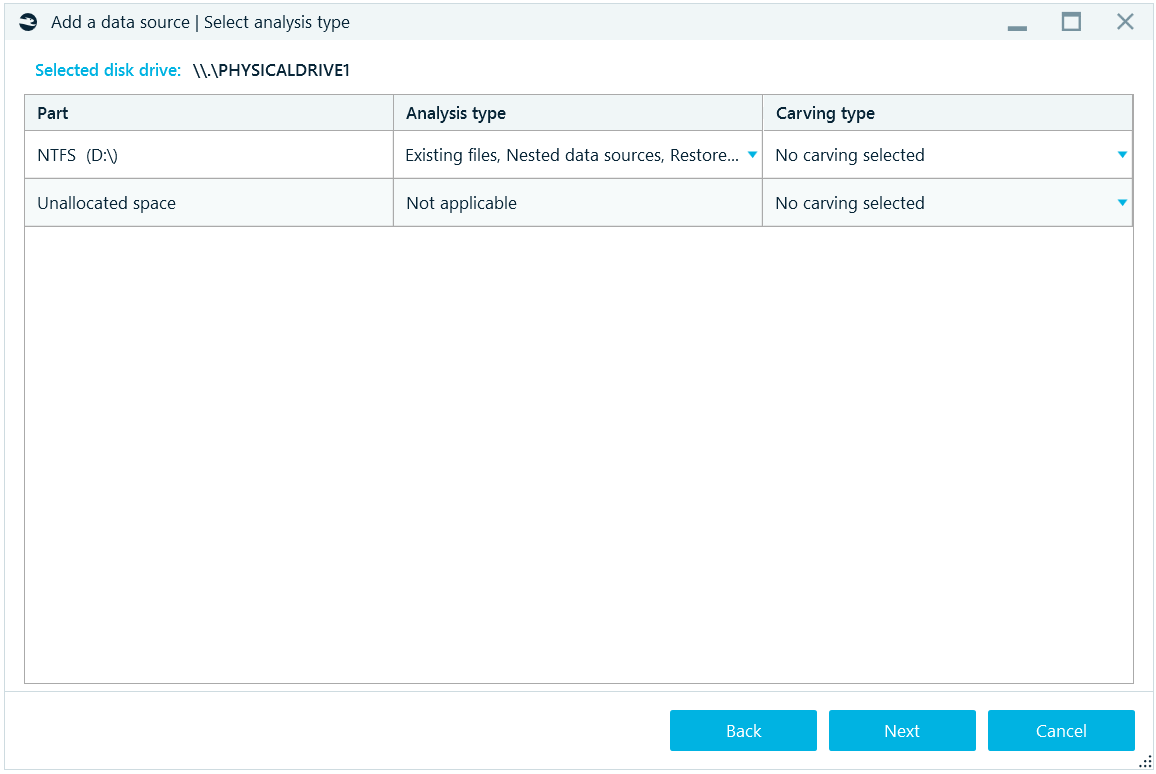
There are two columns on this window for fine tuning the processing of the data source: Analysis type and Carving type.
Analysis type combines all options, which are based on the file system information, such as:
- Existing files: searching for artifacts inside existing files.
- Nested data sources: adding nested data sources to the case or not.
- Snapshots: NTFS-only option which instructs the product to analyze volume shadow copy snapshots.
- Restore recycle bin: NTFS-only option which instructs the product to analyze information about file names of files deleted to the recycle bin.
Carving type combines all options, which are based on the search for signature, such as:
- No carving: do not run search for known signatures.
- Carve all space: carve all available binary data inside the data source and try to recover artifacts based on known signatures.
- Carve free space: NTFS-only option which instructs the product to carve only space which is allocated but not occupied with data. This option allows saving time by not carving unallocated space and occupied allocated space.
After this selection is completed, the product shows you Select advanced analysis options window:
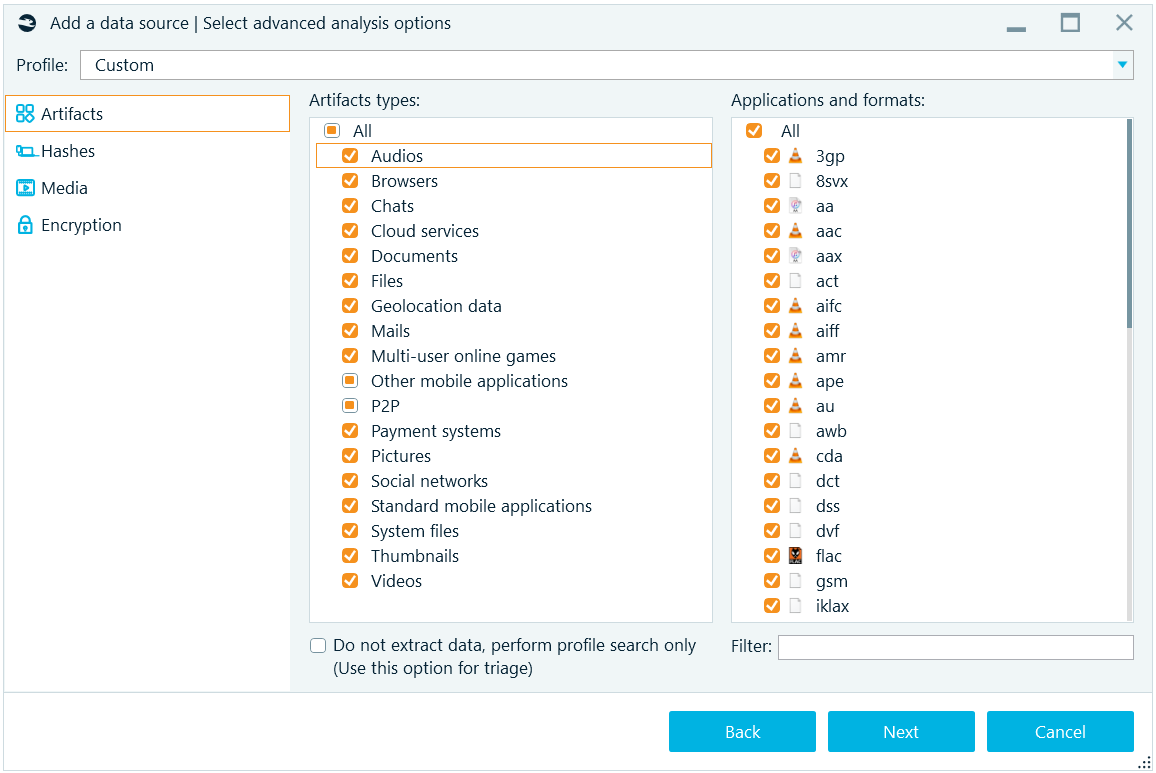
Here, you can select a profile (see 'Profiles' section of this reference) to quick start with predefined options. Then, on Artifacts tab, specify artifacts you would like the product to extract and carve. Note, that once you select an Artifact type in the middle part of this tab, corresponding Application types and formats are shown. You can select all or some or none of artifacts to look for.
Below, there is the box called Do not extract data, perform profile search only. This box allows you to not extract data for application profiles (which may take a while) but to show corresponding profiles only. As an example, instead of extracting mails from an Outlook mailbox, with this option checked the product will only show you that the mailbox exists. This option can be useful to create your own Triage profiles. Alternatively, you can use built-in Triage function (see 'Triage' section of this reference).
In addition, using the Filter box, you can filter out only applications and formats, which have specified substrings in their names (for example, for 'an' they will be Tango, Hangouts, Trillian and others).
On the next tab, Hashes, you can specify hashing algorithms to use and other options:
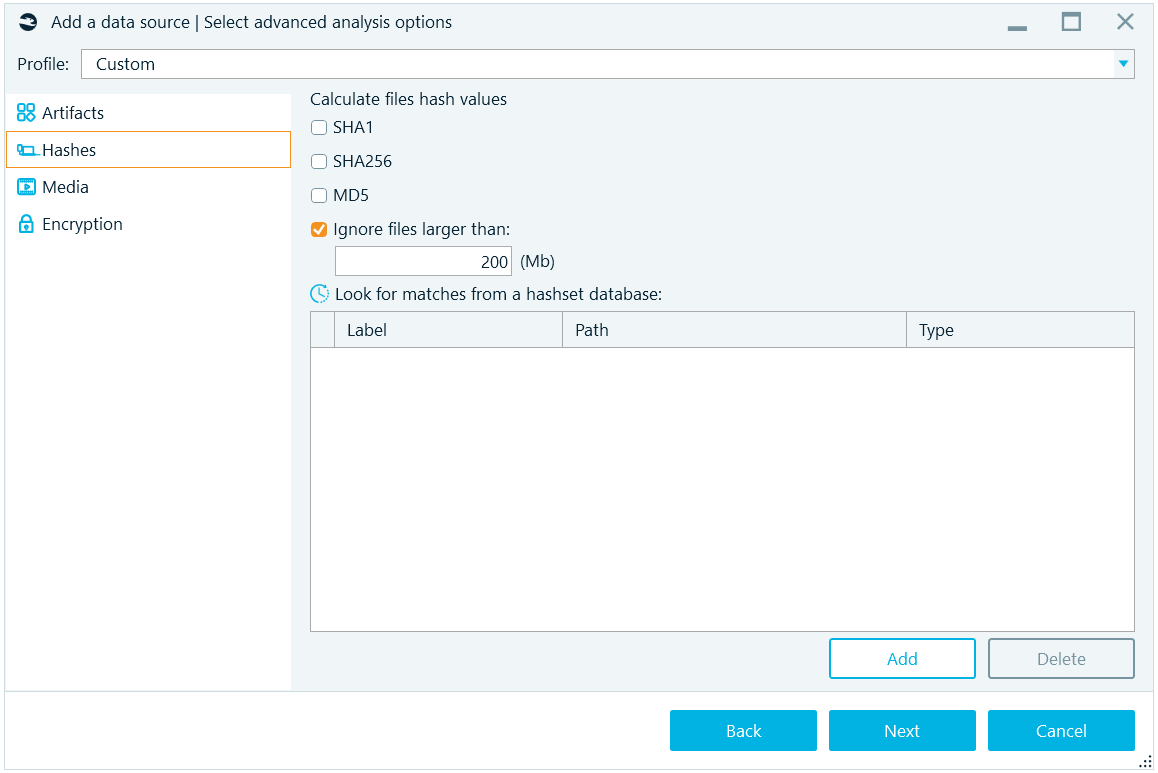
The algorithms available are:
- SHA1
- SHA256
- MD5
Note: MD5 is notoriously known to have collisions. It is recommended to use SHA256 or the pair of SHA1 plus MD5. More on hashing can be found at Belkasoft trainings (https://belkasoft.com/training). Since large files may take a while for their hash calculation, you may decide to exclude such files. With the default settings, files larger than 200 megabytes will not have hash values.
The Media tab of the Select advanced analysis options window allows you to classify pictures and extract key frames from videos:
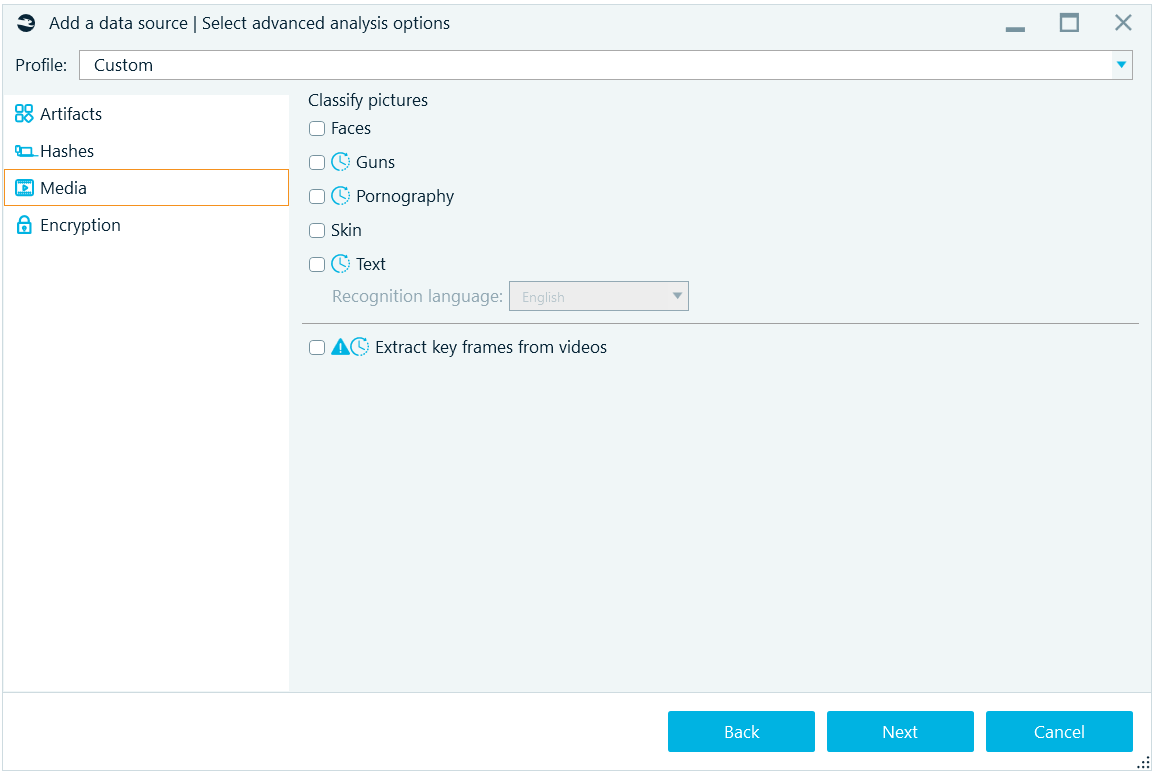
The following picture classes can be detected:
- Faces
- Guns
- Pornography
- Skin
- Text
For text detection, an OCR (optical character recognition) is available. You may specify one of 50 different alphabets available under Recognition language combo box. You may need to download some language files from the Belkasoft website.
At the bottom of this tab, there is an option to Extract key frames from videos. Note the 'extremely long' operation time warning. If your data source contains multiple huge video files such as high-quality movies, you may opt to extract key frames individually from selected videos only.
The key frame extraction operation will produce a set of still pictures for each video. The key frame is a frame from a video, which significantly differs from a previous key frame. Thus, by reviewing key frames only, it is possible to get an idea of the entire video. Belkasoft deliberately does not extract extract frames every few seconds, because it will result in too many unnecessary frames.
The last tab of the Select advanced analysis options window is Encryption. Using the single check box here, you can instruct the product to Search for encrypted files and volumes. The product supports detection of several hundred types of file encryption and about a dozen of various disk encryption including WDE (whole disk encryption) and FVE (full volume encryption).
Once you set all options on this page and click Next, the Review a data source window is shown. Here, you have the last chance to varify the options you specified for the analysis of the data source you have added. Note the green Complete button. Whenever a long process is expected to be run, the product shows you green button instead of a blue one. This way, you have full understanding that the process is about to start with the click on this button, and have the change to change your analysis preferences, using the Back button or even Cancel button, which will close the sequence without doing anything.
See also:
Look for matches from a hashset database
Acquiring data source